 Usually I write my blogposts in Dutch. Because there are still a lot of people in the Netherlands that have more difficulty reading English than Dutch. Sometimes I make an exception if the topic is more technical than otherwise. Because then, the chances of anyone other than myself reading the post increases a lot. This is one of those posts.
Last week, I wrote (in Dutch) about the computational thinking challenge of figuring out where we had not yet walked during this COVID-19 era. I also explained that that solutions, based on the tutorials by Fran Polignano had some room for improvement. The Strava client_id, client_secret and refresh_token were visible in the source code and the script did not use caching of the data it retrieves from Strava while Strava limits the number of calls you can make in a specific period of time (and it also is not good practice to not cache such data that changes no more than once a day).
After doing some searching around about possible solutions, I concluded that there is no real feasible “Javascript/client-side script only” option that hides that info. And caching of the data locally is possible, but would still be only half of a solution because every visitor would have to cache it locally and that could still result in more API call than allowed.
Node.js
When splitting the code into a server-side and client-side part, we can do caching on our own server and hide the credentials to the Strava API on the server. I chose to use Node.js for the server-side because for this use-case I’m using the map stand-alone and it allows me to use the same language (JavaScript) server-side as in de browser. Would the goal have been to build a WordPress plugin, than PHP would have made more sense. There are frameworks that combine Python on the server and JavaScript in the browser, but Node.js it was going to be.
Github
I already mentioned that all code is available online: https://github.com/PiAir/Strava_nodejs
Docker
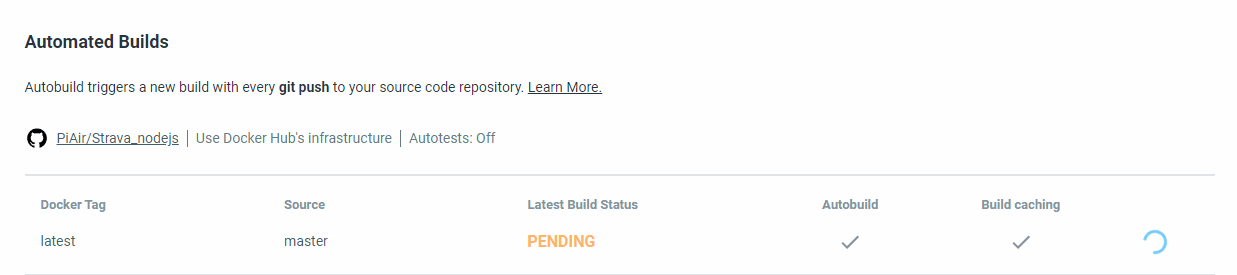
Node.js is cross-platform, so I could have just installed it on my Windows 10 machine. But instead I used Docker, which was already installed on my Synology NAS. With Docker I am able to create a server with everything that is needed with just a single command, I can easily remove the Node.js server and in this case I could use one commandline script to create a development server which reloads and restarts automatically whenever I change something in the code, while a Docker file builds a minimal sized Docker image, based on the same code and files that is suitable for deployment in a stable situation (and can also be started with one commandline). The image is also available on Dockerhub where is being build based on the source code pulled from Gibub (how cool is that!?)
Because of this, you could simply make an .env file like the example on Github, add your Strava credentials and run:
sudo docker run -d --name docker-strava-map --env-file=.env -e "PORT=3000" -p 8084:3000 -u node piair/docker-strava-map:latest
And you would have a server waiting on port 8084 of the machine that you have Docker running on (in this case my Synology NAS) ready to display the map.
Let’s look at some more parts of the solution.
Dependencies
The main Node.js server-file is server.js
As you can tell by looking at that file, the node.js server needs a number of additional modules:
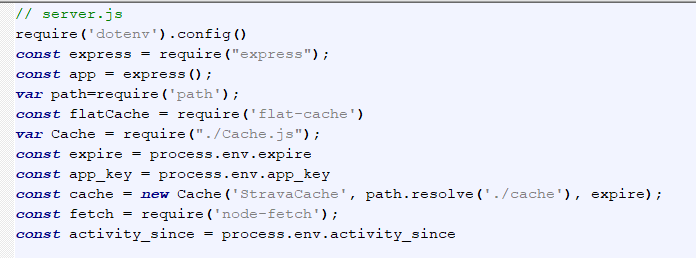
If you are setting up the development environment, you’ll have to install them yourself, while building the Docker image for production, this is done for you by the magic that is called package.json. Let’s look at the development environment first:
On my Synology NAS I create a folder (node-docker) for the scripts I’ll be working on. The run-docker.sh file contains this command:
sudo docker run --rm -it --name node-docker -v $PWD:/home/app -w /home/app -e "PORT=3000" -p 8080:3000 -u node node:latest /bin/bash
The first time I run this, docker will download the latest node.js Docker image from Dockerhub. The working directory within that image is going to be /home/app and that is linked to the current folder ($PWD) on my Synology NAS. I am connected as user “node” to the container that is created based on the Docker image (“-it” means interactive) and after running the command I see a bash prompt. As soon as I exit out of that container, the “–rm” part will remove the container again (but not the local files on the server).
To be able to run my script, I need to initialize the yarn package manager and install the needed packages:
yarn init -y

yarn add express

yarn add -D nodemon

yarn add flat-cache --ignore-engines

yarn add dotenv --ignore-engines

yarn add node-fetch --ignore-engines
After that, yarn startstarts the Node.js server based on server.js. If there are any errors in server.js, they will be shown here and yarn start will fail. Thanks to nodemon, the server will restart automatically after code-changes.
Because I use yarn to install the modules, it will also add them to package.json. And that is the file that is being read when in Dockerfile we use RUN npm install, so I don’t have to worry about having all the needed packages listed in the Dockerfile and the container.
Let’s have a look at the packages that are being installed, nodemon I already mentioned. The others are:
- Express, a Node.js minimalist web framework
- flat-cache, a caching system that uses files for storage. I tried using one of the memory based ones before (apicache), but it had problems handling the large json datasets returned by Strava. Problem with flat-cache is that is has no way to set the time after which a file should be renewed/expire. I use a seperate class Cache (defined in Cache.js) that extends flat-cache with this functionality. Credits go to Pokuan Ho (Paul) for this solution.
- dotenv, this package enables the use of a
.envfile to keep all the Strava credentials and any other setting that I want to be able to change “on the fly”. It is less on they fly than I would have wanted, the .env file is only read when the node.js server is restarted. Not a problem in a development setting, less handy in a production setting. Also have to figure out how to deal with this file if I provide the Docker image via Dockerhub. - node-fetch, a package that enables the use of window.fetch (which was already used in the original JavaScript only version) in Node.js
server.js and strava.api.js
What else is there to explain? There are two main parts to the client-server combination: server.js (the Node.js part on the server) and strava_api.js. My main goal was to move only the parts that were needed to the server because this would keep all the work of actually drawing the maps on the client (and not on my server) which scales better.
Instead of trying to recreate a full Strava API in Node.js, I focused on only the parts that I needed, so server.js contains procedures to handle requests for:
/oauth/token/:key– causes the access_token to be renewed based on the client_id, the client_secret and the refresh_token which never get to the browser. This call is not cached because Strava doesn’t count these as part of the API limit. Requires the app_key (set in .env) to prevent anyone from just calling it and still getting a valid key./athlete/activities/:page– returns the summary of all activities for the logged in athlete, supports paging so you can get more than just what can fit in one page./activities/:id– returns the details for an activity with “id”/app/ignore_activityand/app/show_activity_typesare helper ‘functions’ for the browser-side JavaScript and return the array of activities to ignore (not draw on the map) based on Strava id’s and an array of activity types (can be multiple) to draw on the map./cache/refresh/:keyenables you to manually clear the cache (if you add the correct key, the one that is listed in .env and can be changed by the maintainer of the server)
The first five URLs can be found in strava_api.js where we have four functions:
showMap()– this is the initial function that is being called, in its turn it callsgetSettings()andgetActivities()getSettings()calls/app/ignore_activityand/app/show_activity_typesto get those Array valuesgetActivities()callsgetActivityPage(pageNo)and after it receives a page full of activities, it loops through them, calling/activities/:idfor all activities that need to be displayed on the map, and adds the polyline to the mapgetActivityPage(pageNo)gets one single page of (summary) activity information by calling/athlete/activities/:page
Why does the JavaScript seem to complex?
The complex part about the JavaScript is the fact that the calls to my Node.js server and to the Strava API are asynchronous. Which is great, because if you want to get the detailed info for, say 20 activities, the script is not going to handle them in sequence, it will send the request away as fast as it can and handle the data as soon as it arrives. This greatly enhances the speed with which the map is drawn. But if you want to get the settings from the server using getSettings() and only want to start retrieving and plotting the activities (because you need to know what activity type you’re supposed to draw and what activities to ignore), you need to tell the browser to wait.
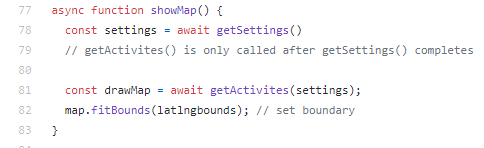
The above code in strava_api.js is an example of how that works. The function showMap()first calls getSettings(), then waits for its response to return, thén calls getActivities()and waits for its completion and then finally runs map.fitBounds(latlngbounds); // set boundary. Without this async – await construction, the code would call getSettings(), then straightaway call getActivities() and probably throw an error because the ID’s of the activities could not yet be checked against the ignore_activity value that will be returned by getSettings() and same for activity_types
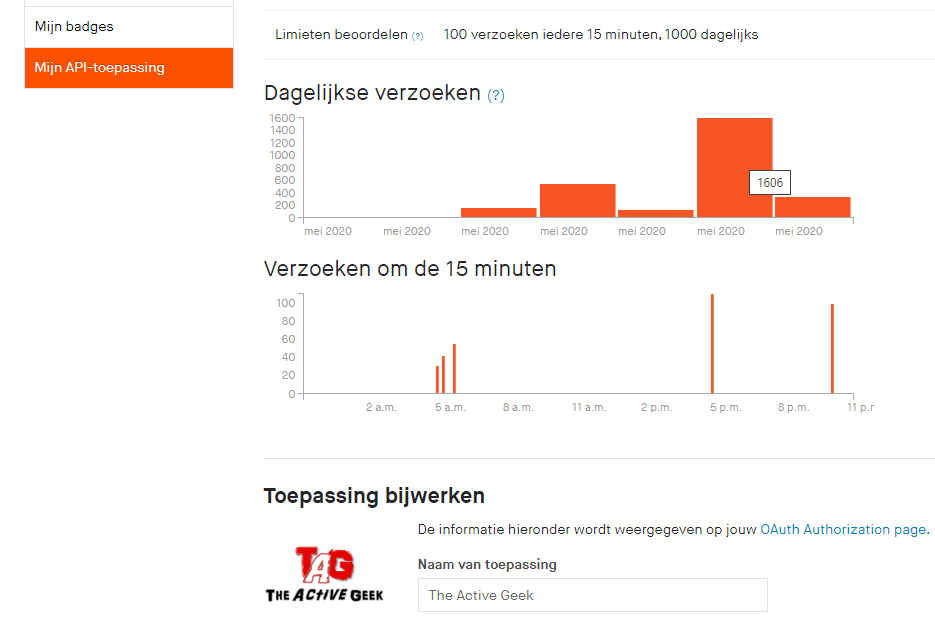
It took some debugging, at first against the Strava API, but it caused some infinite loops and using up all my 1,000 daily allowed API calls (+606 extra so Strava is not too strict). So I practiced on some dummy code first to get it working.
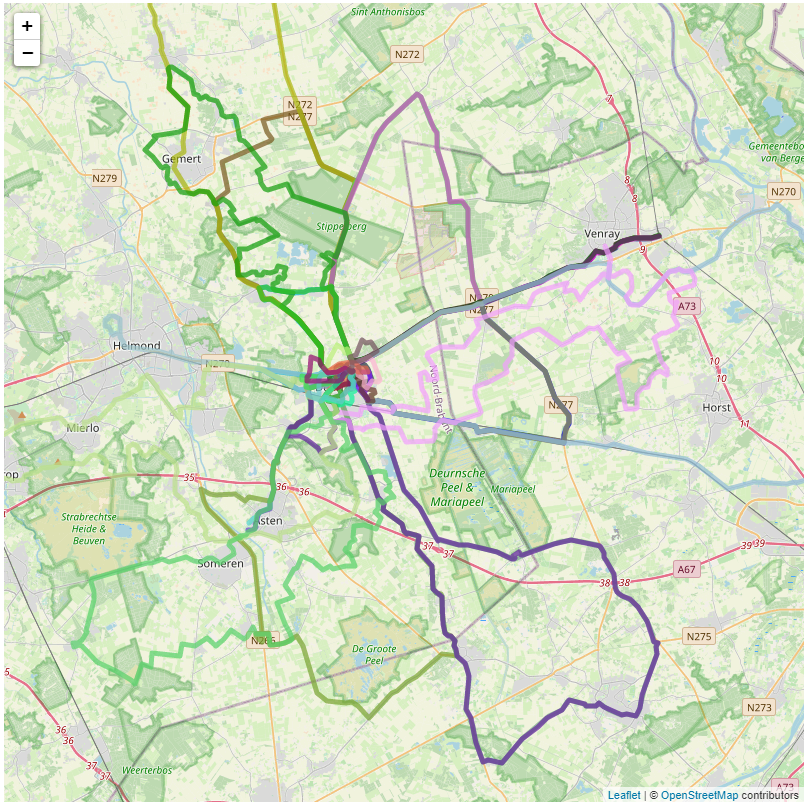
It was fun to learn how to build this better Strava-map. It is funny to see how much tweaking is involved in getting it from a first “it sort of works” to something more robust. And we’ve actually used it a couple of times now to figure out where to go for our evening walk: just take a look at the map and see where we haven’t been before. 🙂
Questions?
So you made it all the way down here. Even though this is not your regular type step by step tutorial, I hope it gives you an idea of how the app/script was build. Is this something that needs a video with a more step by step approach (don’t know if I have time for one, maybe Fran is interested in extending the range he did about this topic?
Who knows.
 AI-tools")


