 Now that Alex explained everyone how to use MQTT in combination with the LoPy, I thought it was time to show some more advanced uses of MQTT in case you still had no idea why you would bother learning to understand it.
The nice thing about MQTT (MQ Telemetry Transport or Message Queue Telemetry Transport) as a protocol, is that it is not tied to the LoPy or WiPy that Alex used in his example. You can use it in combination with many different devices, tools and applications. For example, in our house, I use a Mosquitto MQTT broker as the central backbone for the home automation. For those that can understand Dutch, see this blogpost I did in 2014, or the one about the lights in my Christmas tree.
MQTT is also supported by The Things Network (TTN) meaning that you can retrieve all the data that your nodes send to TTN using MQTT. This also means you can use MQTT as a way to create a local backup of the data that your nodes send this way.
You can also use it in combination with the KPN LoRaWAN network, but the setup is slightly different. So in this post I am going to focus on TTN, although like before I will be using both the Marvin board and the LoPy board (in combination with Puck.js although that is completely optional of course).
I will be using Node-RED installed on one of my Raspberry Pi devices and I will be using MySQL as the database backend. I will be posting about MySQL versus MongoDB versus InfluxDB one of these days, but on a Raspberry Pi for now this was the quickest and easiest solution.
Let’s dive in:
Install Node-RED
I wasn’t sure which version of Node-RED and/or Node.js were installed on my device (it was an existing setup) so I simply followed the instructions on the Node-RED website specific for Raspberry Pi:
bash <(curl -sL https://raw.githubusercontent.com/node-red/raspbian-deb-package/master/resources/update-nodejs-and-nodered)
We will be needing a number of “plugins”, called nodes by Node-RED, so let’s install those:
(cd ~/.node-red)
npm i node-red/node-red-dashboard
npm install node-red-contrib-ttn
npm install node-red-node-mysql
The first one is a flow that allows us to create a dashboard in Node-RED, it is not absolutely necessary, but nice.
The second one provides us with the connector to TTN, which we do really need. The third one allows us to connect to the MySQL database.
You might also want to follow the instructions on this page that deal with securing your Node-RED editor page preventing others from changing your flows.
Finally, we want to make sure that Node-RED runs as a service and is started as soon as we start the Raspberry Pi. Take a look at this page for that. It is as simple as:
sudo npm install -g pm2
pm2 start /usr/bin/node-red --node-args="--max-old-space-size=128" -- -v
pm2 save
pm2 startup
Install MySQL
My machine did’t have MySQL installed yet, so I had to install it and then created the database for Node-RED to use later:
$ sudo apt-get install mysql-server python-mysqldb
$ mysql -u root -p
Enter password.
mysql> CREATE DATABASE nodered;
mysql> USE nodered;
mysql> CREATE USER 'nodered'@'localhost' IDENTIFIED BY 'nodered';
mysql> GRANT ALL PRIVILEGES ON nodered.* TO 'nodered'@'localhost';
mysql> FLUSH PRIVILEGES;
mysql> CREATE TABLE mqtt (id int(11) NOT NULL AUTO_INCREMENT, timestamp datetime NOT NULL, topic text COLLATE utf8_unicode_ci NOT NULL, data text COLLATE utf8_unicode_ci NOT NULL, UNIQUE KEY id (id)) ENGINE=MyISAM DEFAULT CHARSET=utf8 COLLATE=utf8_unicode_ci;
mysql> quit;
p.s. if you followed along you created a user “nodered” with password “nodered” in the MySQL database. You might want to change that, although the user only has rights to the database when connected to the Raspberry Pi (could of course also be via SSH). By that time you probably have bigger problems than just someone reading this post and guessing your password. But better safe than sorry!
Connecting everything together
Now we can start connecting it all together. Another page to keep handy for some extra info is the quick start for Node-RED at TTN. It explains that you need to add a device node first and then message nodes to actually receive the data.
 Within Node-RED everything works using nodes that are connected by drawing lines from one node to the other. The data (“message”) is then transferred from one Node-RED node to the next. Sometimes flows are very simple. For example, on the right you see purple nodes that connect to my MQTT service and collect the humidity or the temperature of our bathroom by subscribing to the MQTT topic for those values. As soon as a new value is received, it is sent to a number of nodes: both MQTT nodes send their values to a debug node (allowing me to see the value in the debug pane in Node-RED). The humidity goes to a gauge on the dashboard, the temperature goes both to a gauge and a chart.
Below it you can see an example of a switch that is displayed on the dashboard and as soon as I toggle it, the corresponding value is sent to the MQTT server (there is another device listening to that topic and if I toggle the switch off it knows how to switch of the lamp).
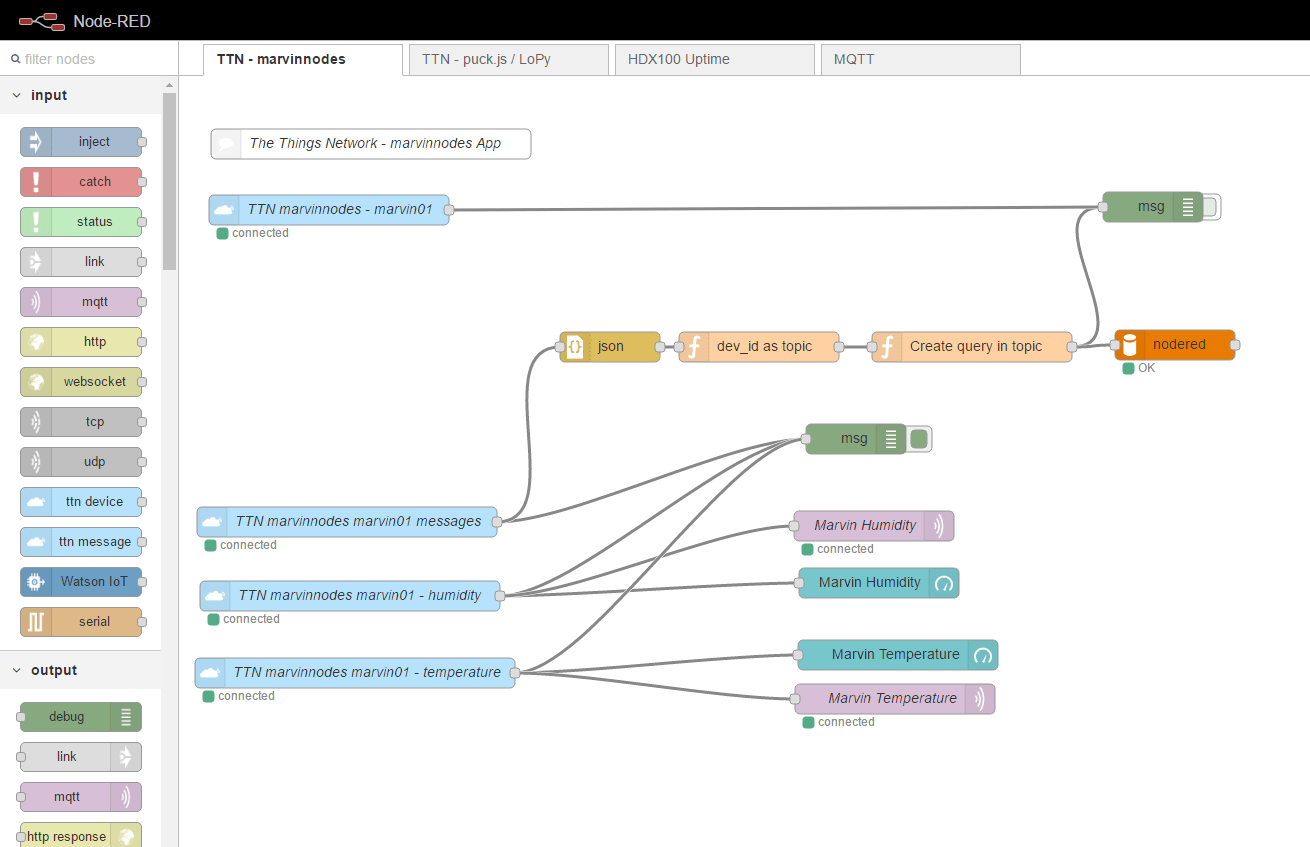
The flows for TTN in itself aren’t much more complex. The one at the topic of the post is for the Marvin board, this is the one for the LoPy + Puck.js:
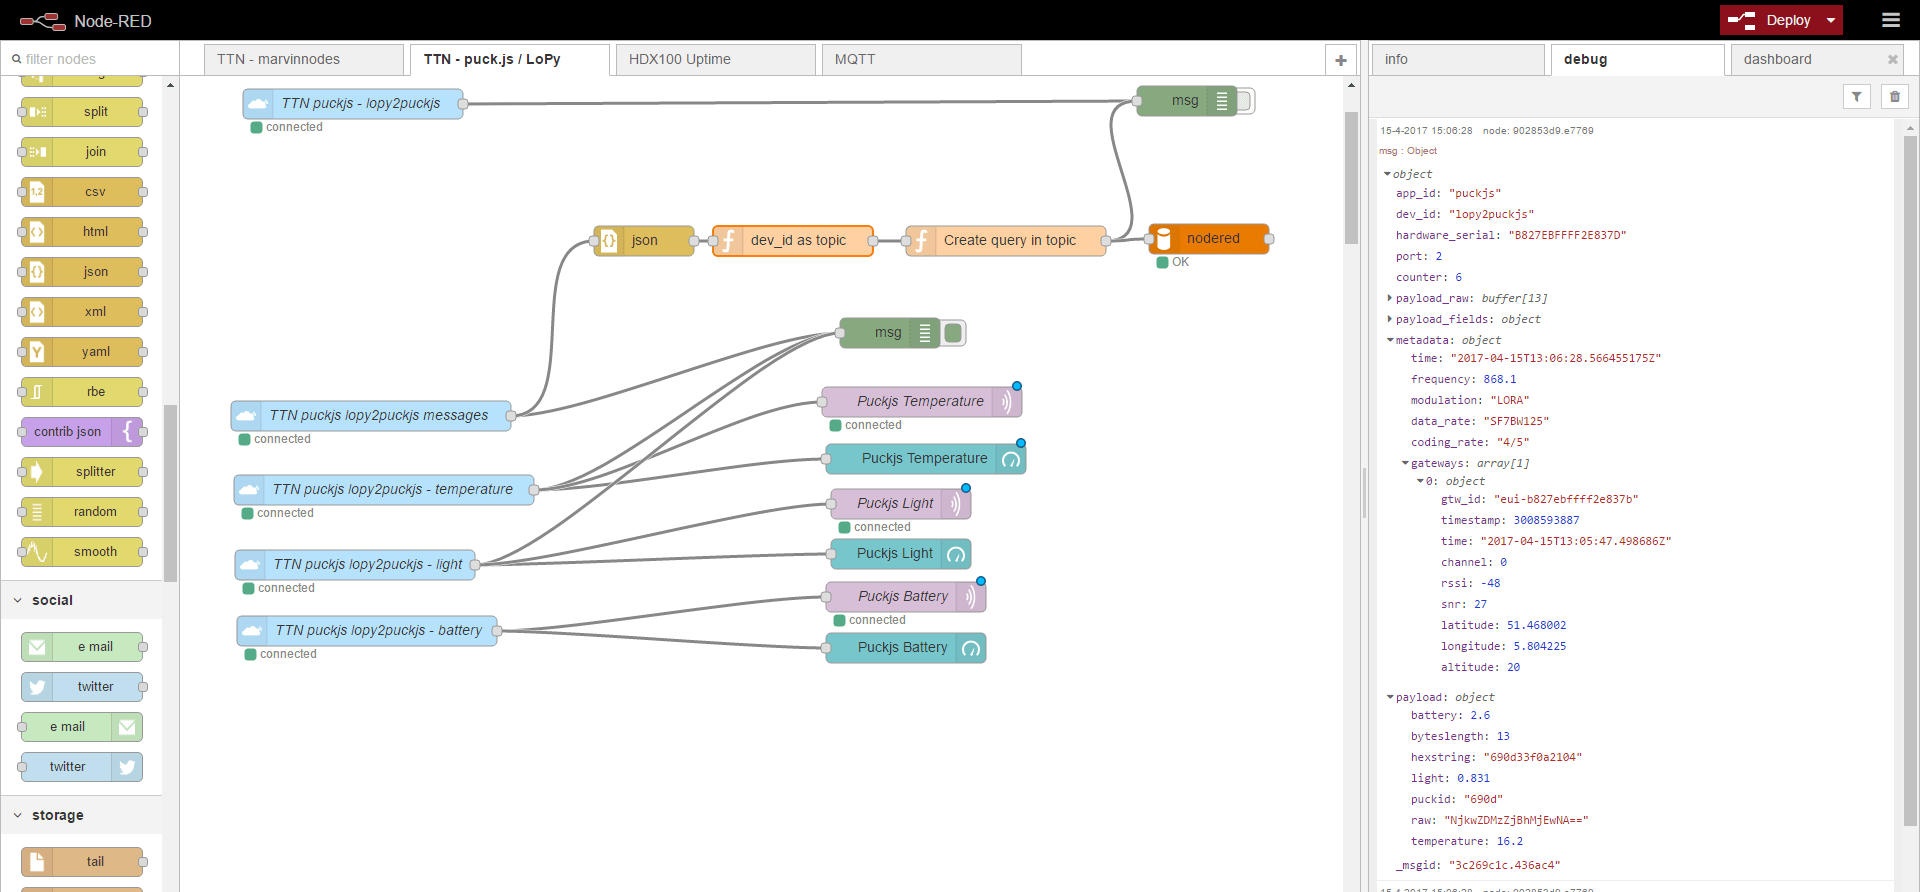
If you click on the image, you can see the larger version. Let’s have a look at the nodes.
The top one connect to the device in TTN which is part of an app. The Access key is provided by TTN and makes sure that not just anybody can connect to your data.


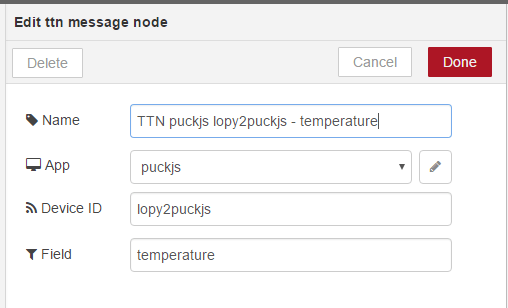
The other four light blue TTN nodes are message nodes. The first one (see image below on the left) returns all the data in the MQTT message provided by TTN, the others only provide a single field (in the image below it is just the temperature).

The values for temperature, light and battery are displayed in a gauge on the dashboard (the green nodes on the right), all values are send to the debug console. The values for temperature, light and battery are not just sent to the dashboard, the purple nodes on the right connect to my local MQTT server. The result of that is, that the temperature value is no longer just available on the TTN server or in Node-RED, it is available to any tool within my network that is allowed to connect to my MQTT server and listens to that topic. Pretty cool, isn’t it?
Store the data to MySQL

Then there is one final part of the flow that I haven’t covered yet. And that it the part that takes care of storing all the received values in the MySQL database. The node on the right (orange) handles the connection to the database, it hold the host address (in this case local host because the MySQL server is on the same device as Node-RED, the port (3306), the username (nodered), the password (nodered or if you were smart something different) and the database (nodered).

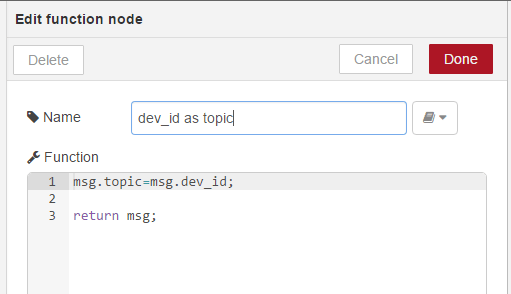
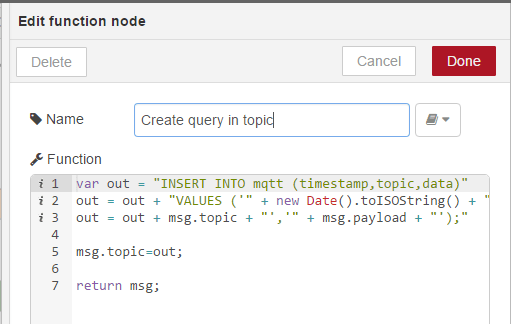
The other three nodes you can see above. The json node just flattens the object to a json string. The next node adds the device id as the topic, the last node creates the INSERT statement that insert the data into the MySQL database. Credits for that code goes to user smadds at the Node-RED site.
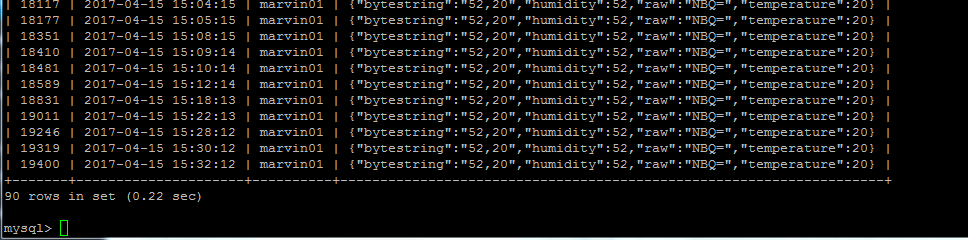
The result in the database looks like this:

True, it does not look nice. The full JSON string is stored in a single field. The advantage is that this is very flexible. For example, the Marvin sends two values and the same code/script stores that in the same table:
Store the data to MySQL #2
While the above method is nice if you just want to store the data for later retrieval, there is a way to make the data more readily available while still storing it in the MySQL. The ’trick’ lies in the fact that I choose to also send the data that I retrieve from TTN back to my own MQTT server.
Using a similar method as above, I also store all values from that server in the MySQL server:

Because here the values get their own MQTT topic, they are also easily retrievable from the database afterwards:

The lesson from all this is that it takes a bit more thinking and work to get the data in a more easily structured way into the MySQL database.
Dashboard
One last thing we haven’t looked at it the dashboard. I showed the nodes that add the gauges and chart to the page. The result looks like this:
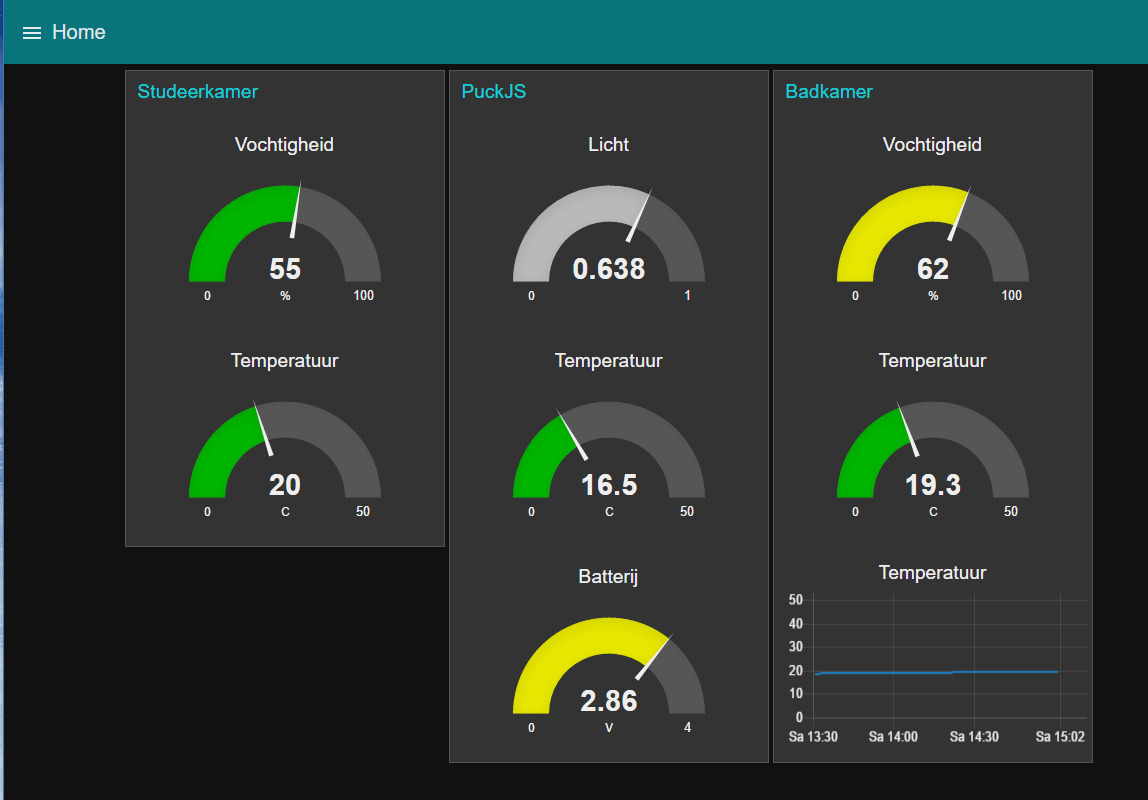
I think the cool thing here is that the first gauge shows data provided by a sensor that uses 433 Mhz to communicate with a base station here in the house (post in Dutch about that station) which in its turn stores the value in my local Mosquitto MQTT server. The middle one is provided by the combo Puck.js + LoPy over TTN network, the right one is provided by the Marvin board over TTN. Three different technologies combined in one single dashboard and all data archived afterwards in the MySQL database.
What is next?
There is still more that can be done. The metadata from TTN isn’t stored in the database yet at the moment. Another thing would be to add checks to see if the network is down (resulting in no more data coming in). Like I said, I want to look at other databases, possible better suited for storage of JSON data.
And of course the use-case where Node-RED is the endpoint for the KPN LoRaWAN infrastructure. But first it is Easter weekend. 🙂


