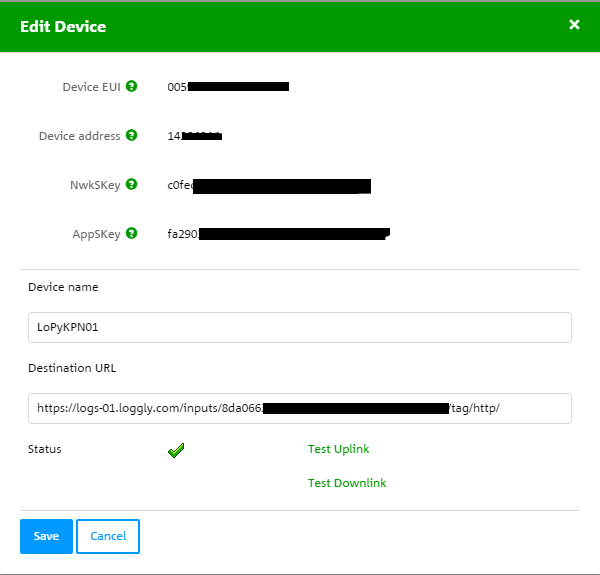
 In the Netherlands, KPN was the first to offer nationwide coverage of a IoT network based on LoRaWAN. You can read about my first tests using their Network in combination with the Marvin node in this post. Unlike with the IoT network that for example is currently being rolled out by T-Mobile, which uses NB-IoT and different hardware than The Things Network (TTN), switching a device from the TTN network to the KPN network is simple: just change the DEV_ADDR, NWK_SWKEY, APP_SWKEY values in the config.py of you Pycom LoPy to the values that are provided in the management environment of KPN (see image left). No changes in the microPython code needed. You could even have a device connect to both networks and switch between them (although you probably don’t want to do that when you’ve got a battery powered node).
KPN offers a free test period where you can test your nodes on their infrastructure without having to pay. It is what I used for my train trip last month where I used both the Marvin node (connected to KPN) and the LoPy (connected to TTN) as a way to get a feel for coverage while moving in the Netherlands.
Besides the fact that KPN offers a commercial solution, the free test version (don’t know about the paid version) has a number of differences: unlike TTN where they provide a number of integration options (Cayenne, Data Storage provided by TTN, HTTP integration, IFTTT Maker), KPN only offers HTTP integration. This means you have to provide a destination URL for an HTTPS endpoint where the data is stored. In the Marvin workshop they use Hookbin.com as a free and easy to setup endpoint. But endpoints created there only store data for a limited time. That is why I now use the free version of Loggly.com to collect the data. But of course, the data is only useful if I manage to get it from Loggly to my own local system.
A second difference is a bit of a mystery. If I used the Marvin to send data over the KPN network, the data gets encrypted by the Marvin, but automatically is being decrypted again on the KPN server. But if I use the LoPy to send data over the KPN network, the data shown in the debug console at KPN and the data received by Loggly is still encrypted.
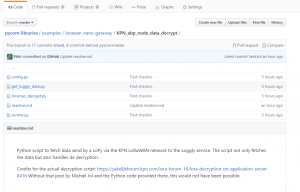
I managed to get both challenges resolved and in this post I’ll do a write-up not of the (lengthy) process of getting to the working code, but of the end result. All code is available on Github.
 Getting the data from Loggly
I assume that you have created an account at Loggly, created an endpoint and use that on the KPN network to receive the data. You then have to add your username and password for Loggly in the config.py file provided.
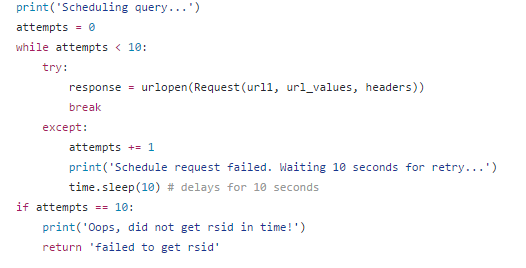
Loggly provides clear information about how you can retrieve data that you’ve logged on their service. Important to know is that it is a 2-step process. At first you send a search query to the service. That is then scheduled and you receive the id that you need to use in a second query to retrieve the results. Tricky however is that there are some limits. You cannot send to many search queries after another and there is no set fixed time between the moment that you receive the id and the moment that the data is available. In the get_loggly_data_py file you can see how I solved that challenge. I use a combo of a while loop that keeps track of the number of attempts and a try/except construction to try the queries until they are successful.
My initial plan was to only retrieve the latest datarecord, but it looks as if loggly ignores my request for only 1 record. So, the rest of the code then cycles through all the returned records. The returned data is in JSON format, allowing me to get all the fields that I want very easily. Besides the “payload_hex” (the still encrypted data), I retrieve the DevEUI of the node so I can handle multiple nodes (if needed) in a single script, I retrieve the “FCntUp” (I need that one for the decryption), the time the package has been received, the spreadingfactor (“SpFact”), the signal-to-noice ratio (“LrrSNR”), the Received Signal Strength Indicator (“LrrRSSI”) , the id of the Gateway that received the package (“Lrrid”), the Gateways latitude (“LrrLAT”) and its longitude (“LrrLON”).
We now have all the info needed (combined with the info in the config.py) to do the decryption.
 Decrypting the data
In a post at the KPN forums, Michiel Jol provides detailed information about how the decryption of data send via the KPN LoRaWAN network should be done. You can see the steps in the image on the left. At first I did a manual test using this site mentioned to generate a key and this site to then get the decrypted result.
The forum post also contains a number of examples of how to do it in code. And it turned out that the provided example code in Python even worked on my Windows 10 Python install. Although, I did have to install the cryptography libraries first using pip install cryptography
from the command prompt.
The code requires a number of things to do the decoding:
- payload_hex: hex-encoded payload => retrieved from Loggly
- sequence_counter: integer, sequence counter => FCntUp retrieved from Loggly
- key: 16-byte hex-encoded AES key. => get AppSKey from the KPN Edit Device screen (see above) and add it to config.py
- dev_addr: 4-byte hex-encoded DevAddr => get Device address from the KPN Edit Device screen (see above) and add it to config.py
- direction: 0 for uplink packets, 1 for downlink packets => in our case always “0”, so the default provided value can be used.
How to run
If we look at the files provided on Github:
- config.py contains your Loggly username + password + AppSKey, DevAddr and DevEUI
- loramac_decrypt.py contains the decryption code, no need to change anything here
- get_loggly_data.py contains the code to get the data from loggly and to handle the decryption (using loramac_decrypt.py), no need to change anything here
- runme.py contains all code to run it: just type
python runme.pyand watch the magic happen.
A file dataset.txt is created with the result as a JSON string. Another step would of course be to store the data in a MySQL or other database. You could then run the script say every 5-10 minutes to retrieve new values, add them to MQTT or do other actions based on the dataa. If you create that code, let me know, I would love to add that.
[update: code has already been added to the repository!]
Conclusions
I wasted a lot of time trying to build this in Javascript at first, I ended up using Python in the end. I noticed that the advantage of using microPython on the LoPy is that my skills in writing Python code are also slowly improving. Although like always: use the code at your own risk. It is provided as is!
And of course if it has been useful for you, it is always nice to hear that it was. 🙂
Quick Tip:
The code is in a subfolder from the repository that I forked from Pycom: https://github.com/PiAir/pycom-libraries/tree/master/examples/lorawan-nano-gateway/KPN_abp_node_data_decrypt
Github does allow you to download full repositories, but not single folders.
You can if you install svn. On Linux use: apt-get install subversion to do so.
You can then use: svn export https://github.com/PiAir/pycom-libraries/trunk/examples/lorawan-nano-gateway/KPN_abp_node_data_decrypt KPN_decrypt to download just the needed .py files to a folder KPN_decrypt. Look carefully at how /tree/master/ is replaced by /trunk/
 AI-tools")


